You can connect a PowerShell with your Azure VM and use it as if you were sitting in front of the remote machine.
But why would you want that?
- It uses less more resources, because the server doesn’t need to show a graphical user interface
- There is no Terminal Server license required
- Recurring tasks can be completed faster by scripts.
The connection between PowerShell and your Azure VM could not be established by not only typing a few commands, you also need to do a few preparations on the server and client side.
Endpoint for die Azure VM
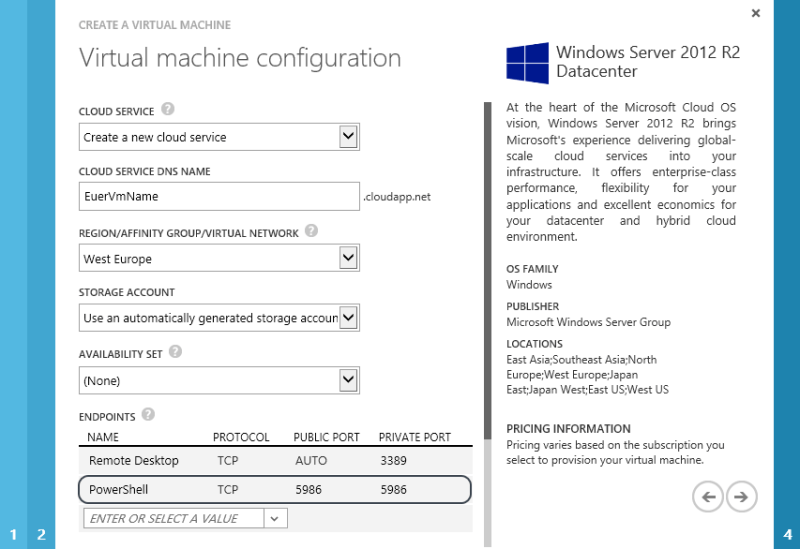
An endpoint (Private Port 5986) must be defined for PowerShell on the server side. When you create a new VM from the gallery in the Azure Management PortalAzure Management Portal creates this directly for you.
Under “endpoints” of your VM you can check if everything is correct or make subsequent changes or additions.
With PowerShell itself you can of course also manage the endpoints for the VM. The corresponding cmdlets are:
As you can control Azure VMs with PowerShell, I have described here.
SSL certificate for the client
Since Azure VMs are backed up on a self-signed SSL certificate, you must install this before for your client.
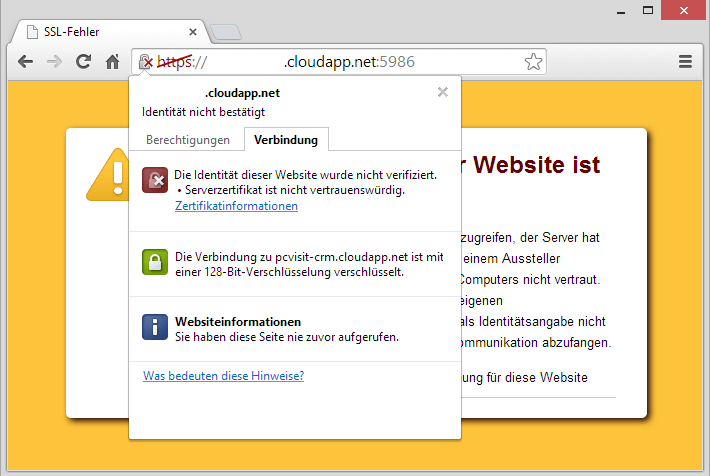
Call the URL https://YOURVM.cloudapp.net:YOURPUBLICPORT, best with Chrome on. There is no website that appears, but Chrome offers you to save the certificate.
Click on the appearing lock in the address bar, and in the following menu on “Certificate information”.
In the opening Certificate window you will find the tab “Details” the opportunity to save the certificate locally.
Just leave this all to the default settings.
Now open the saved certificate, and select the tab “General” then “Install Certificate”.
In the following dialogue you stay on “current user”, but select “all certificates in the following store” and the location “Trusted Root Certification Authorities”.
Have you done everything right you do not see this error message when you perform the next step.
Enter-PSSession : Connecting to remote server EUREVM.cloudapp.net failed with the following error message : The SSL connection cannot be established. Verify that the service on the remote host is properly configured to listen for HTTPS requests. Consult the logs and documentation for the WS-Management service running on the destination, most commonly IIS or WinRM. If the destination is the WinRM service, run the following command on the destination to analyze and configure the WinRM service: “winrm quickconfig -transport:https”. For more information, see the about_Remote_Troubleshooting Help topic.
At line:1 char:1
+ Enter-PSSession -ComputerName EUREVM.cloudapp.net -Port 5986 -Credential A …
+ ~~~~~~~~~~~~~~~~~~~~~~~~~~~~~~~~~~~~~~~~~~~~~~~~~~~~~~~~~~~~~~~~~~~~~~~~~~~~~~~~
+ CategoryInfo : InvalidArgument: (EUREVM.cloudapp.net:String) [Enter-PSSession], PSRemotingTransportException
+ FullyQualifiedErrorId : CreateRemoteRunspaceFailed
Connect PowerShell with Azure VM
With the following command you can now connect to the Public Port of Endpoint your PowerShell with the Azure VM::
Enter-PSSession -ComputerName YOURVM.cloudapp.net -Port YOURPUBLICPORT -Credential USERNAME –UseSSL


